How to Create and Broadcast a P2PKH Bitcoin Transaction
In the first post of our blog, we are going to explain how to make a Bitcoin transaction using the Bitcoin Java Library. More specifically, we are going to talk about a P2PKH (Pay to Public Key Hash) transaction.
For this experiment to work, first, we need to create a private key, derive an address from it, and fund the address. That will be the address that we are going to use in the transaction’s input. Notice that the way we are creating our private key here (using an arbitrary hexadecimal string as the secret to derive it) is only for testing purposes. Never create private keys for real transactions like that. Use secure procedures to do that (such as the ones described at BIP32) instead.
					import io.github.bitcoineducation.bitcoinjava.*;
import org.bouncycastle.jce.provider.BouncyCastleProvider;
import org.bouncycastle.util.encoders.Hex;

import java.io.IOException;
import java.math.BigInteger;
import java.security.Security;
import java.util.ArrayList;
import java.util.List;

public class Example {
    public static void main(String[] args) throws IOException {
        Security.addProvider(new BouncyCastleProvider()); // Bitcoin java uses the library Bouncy Castle to provide cryptography functions, so we add its provider to Java Security

        String secret = "1234fafafaef";
        System.out.println("Private Key for input: " + secret);

        PrivateKey privateKey = new PrivateKey(new BigInteger(1, Hex.decode(secret))); // We convert the hexadecimal secret to a BigInteger before passing it to the PrivateKey's constructor
        System.out.println("Address for input: " + privateKey.getPublicKey().addressFromCompressedPublicKey(AddressConstants.TESTNET_P2PKH_ADDRESS_PREFIX)); // We are making a testnet transaction

        // Output:
        // Private Key for input: 1234fafafaef
        // Address for input: ms8L97CtBHV3qU2AGzpKnRYFyyv5WbMcR7
    }
}
Now that we have an address, we are ready to receive bitcoins. Notice that we generated an address valid only on the Bitcoin testnet. We will get bitcoins from the Bitcoin testnet because it is for free. If we wanted to make a bitcoin transaction on the mainnet, we would change the constant TESTNET_P2PKH_ADDRESS_PREFIX in the code above to MAINNET_P2PKH_ADDRESS_PREFIX.
Let us get test bitcoins. For that, we are going to use a testnet faucet. Access this link and follow the instructions. Use the address derived above to receive test bitcoins. Since faucet websites are a little unstable, there is a chance this link will not work when you access it. If that is the case, you can search for “bitcoin testnet faucet” on Google and try your luck on other sites. Take note of the ID generated by the faucet’s transaction.
String inputTransactionId = "3727aacf19dea8bbb5cb284862d152da75475b3f503726b244d5463487770587";
Now we have to choose an address to send our received test bitcoins. It is best practice to give back our test bitcoins to the faucet owner we get them from, hence we assign a variable to an address belonging to the faucet.
String receivingAddress = "mkHS9ne12qx9pS9VojpwU5xtRd4T7X7ZUt";
Let now us create the input of our new transaction. For that, we are going to need the ID of the transaction that funded our address and the output index of the same transaction associated with our address. The former we have assigned in the variable inputTransactionId (if you have not, do not worry, we will now). The latter we will discover by using a Blockchain Explorer.
You can use any testnet Blockchain Explorer, but my preferred is the Blockstream Explorer. If you are making a real Bitcoin transaction, it is not advisable to type your transactions IDs or addresses on an online Blockchain Explorer, due to the risk of linking your IP to your addresses and transactions. Instead, for mainnet transactions, it is best recommended that you get transactions from your Bitcoin node. Go to this link, type the transaction’s ID on the search bar, and press enter. If you lost the transaction’s ID, type your bitcoin address, press enter, and click on the latest transaction’s ID on the next page.

Now, scroll the page down. You will find two columns of blocks. The one or more blocks on the left side are the transaction’s inputs, and the ones on the right side are the transaction’s outputs. Take note of the output’s index on the left side of your address.
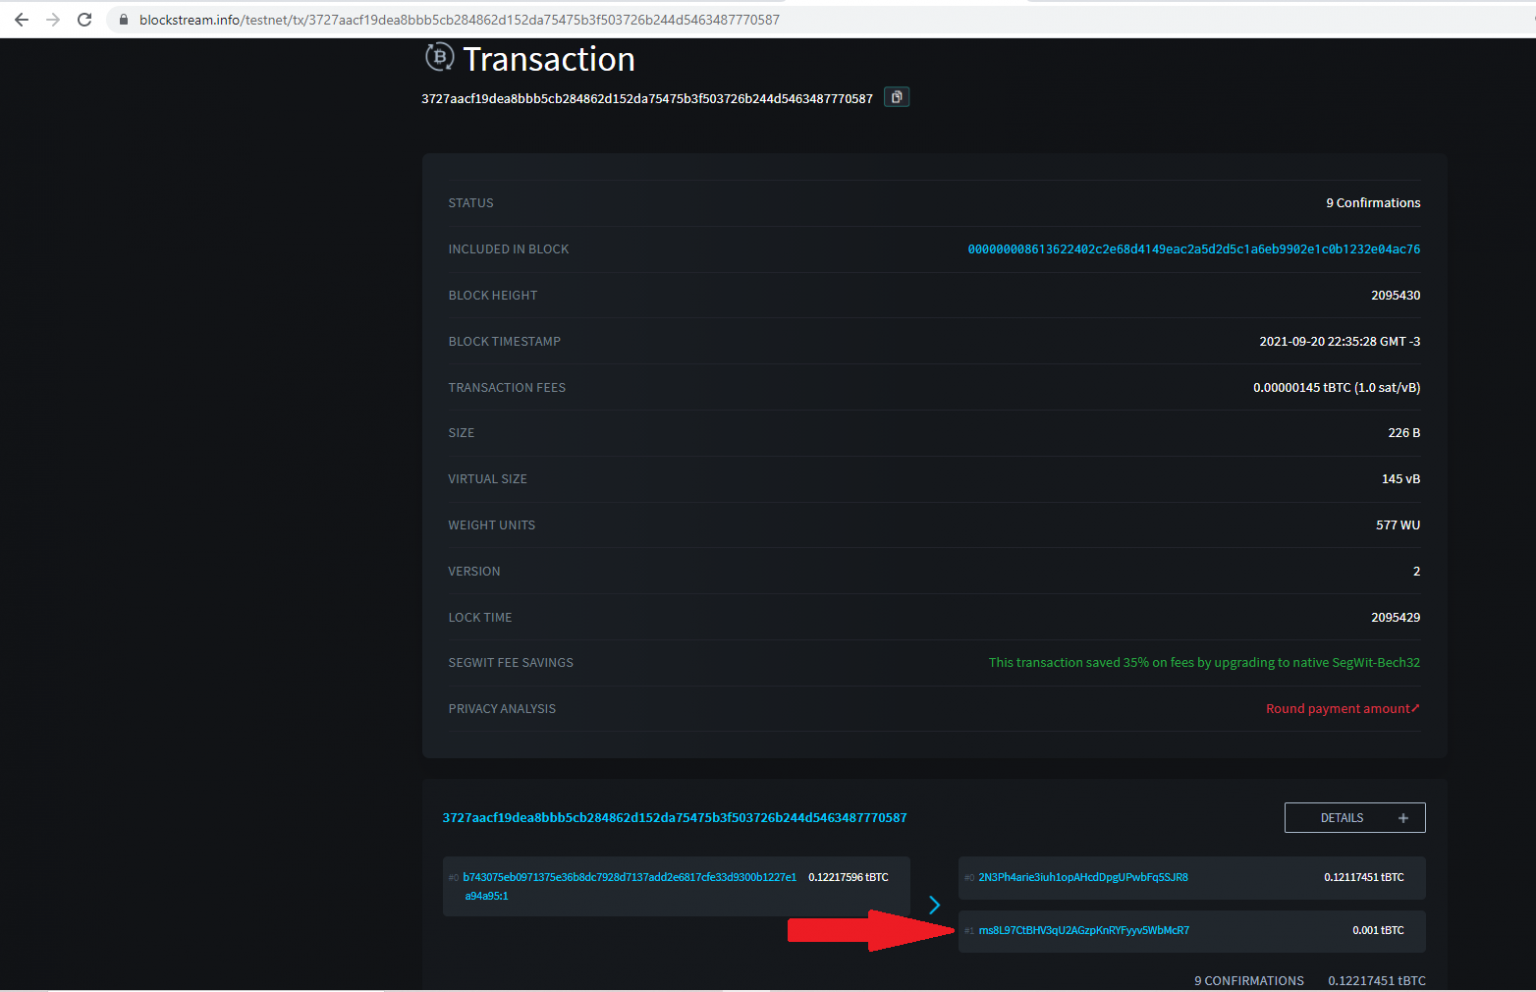
BigInteger inputTransactionIndex = BigInteger.ONE;
We can now build our transaction’s input. We are also going to add it to our transaction’s list of inputs.
					    TransactionInput transactionInput = new TransactionInput(
            inputTransactionId,
            inputTransactionIndex,
            new Script(List.of()), // Since we are building an unsigned transaction input (it will be signed later), we pass an empty script sig here
            new BigInteger(1, Hex.decode("ffffffff")) // This is a default value used for transactions like this
        );
        ArrayList<TransactionInput> transactionInputArrayList = new ArrayList<>();
        transactionInputArrayList.add(transactionInput); // Transactions can have many inputs. In our case, it has only one
Now, we will start to build our transaction’s output. To make things simple, we are going to make only one output, but most transactions have an additional output, called change. Since every input must be spent as a whole, and most of the time you do not want to transfer the total value contained in that input, changes are necessary. But they are simple to make: just add another output using your address as the recipient address.
First, we have to choose the amount that we want to transfer. Since I received 0.001 test bitcoins (or 100,000 test satoshis) and I am not going to create a change, I will transfer 0.0009 test bitcoins (or 90,000 satoshis). Why do we not choose 100,000 satoshis? Because we must include a transaction’s fee. The transaction’s fee is an implied amount, and it is equal to the difference between the sum of bitcoin amounts in inputs and the sum of bitcoin amounts in outputs of a transaction. So, in my case, the transaction’s fee will be equal to 10,000 satoshis, which is more than enough for this transaction. Of course, if this were a mainnet transaction, I would calculate the fee to be just the necessary for miners to add it to the blockchain. How to calculate adequate transaction fees is a topic for another post.
					        BigInteger amount = BigInteger.valueOf(90000); // We choose an amount to send in satoshis
        TransactionOutput transactionOutput = new TransactionOutput(amount, Script.p2pkhScript(Base58.decodeWithChecksumToHex(receivingAddress))); // The method p2pkhScript will make the scriptPubkey for the output
        ArrayList<TransactionOutput> transactionOutputArrayList = new ArrayList<>();
        transactionOutputArrayList.add(transactionOutput); // Transactions can have many outputs. In our case, it has only one. If you need change for your transaction, add another output to the list
Now that we have the transaction’s inputs and outputs, we can create our new transaction.
					Transaction transaction = new Transaction(
        BigInteger.ONE, // Transaction version, we set it equal to one for this type of transaction
        transactionInputArrayList,
        transactionOutputArrayList,
        BigInteger.ZERO, // Locktime, we set it equal to zero for this type of transaction
        false // We are not making a Segwit transaction, so we set it to false
    );
    System.out.println("Unsigned transaction: " + transaction.serialize());

    // Output:
    // Unsigned transaction: 0100000001870577873446d544b22637503f5b4775da52d1624828cbb5bba8de19cfaa27370100000000ffffffff01905f0100000000001976a914344a0f48ca150ec2b903817660b9b68b13a6702688ac00000000
Now we just need to sign the transaction. Each transaction’s input requires a signature generated using the same private key used to create the address for that input. Since we are using only one input, we will need only one signature. For transactions with more than one input, repeat the method call below for every input, changing the private keys and indexes (and the other parameters if it is a Segwit input – yes, you can include Segwit and non-Segwit inputs in the same transaction).
					TransactionECDSASigner.sign( // This method will modify the transaction object, including the signature in it. We have to call it for each transaction input.
        transaction,
        privateKey, // The private key used to generate the address from the input we are signing
        0, // Index of the input we are signing
        null, // Since it is not a Segwit input, we don't need to include an amount
        false // Since it is not a Segwit input, we set it to false
    );
    System.out.println("Signed transaction: " + transaction.serialize());

    // Output:
    // Signed transaction: 0100000001870577873446d544b22637503f5b4775da52d1624828cbb5bba8de19cfaa2737010000006b4830450221009ccad8f398747aa914806a1eda45ca61fafc79b274ae5fce7baf78b60d25d224022022689efe6f39dc56f055c018e4814916603b97fc462d2d8f3782a6e2a04ab34e012102d8c71893d547187848e311caedf4b7cbfbc38f13ea5641e8a20b1fa637bbbac6ffffffff01905f0100000000001976a914344a0f48ca150ec2b903817660b9b68b13a6702688ac00000000
Notice that the serialized signed transaction is bigger than the unsigned transaction. The difference is due to the presence of the signature in the former.
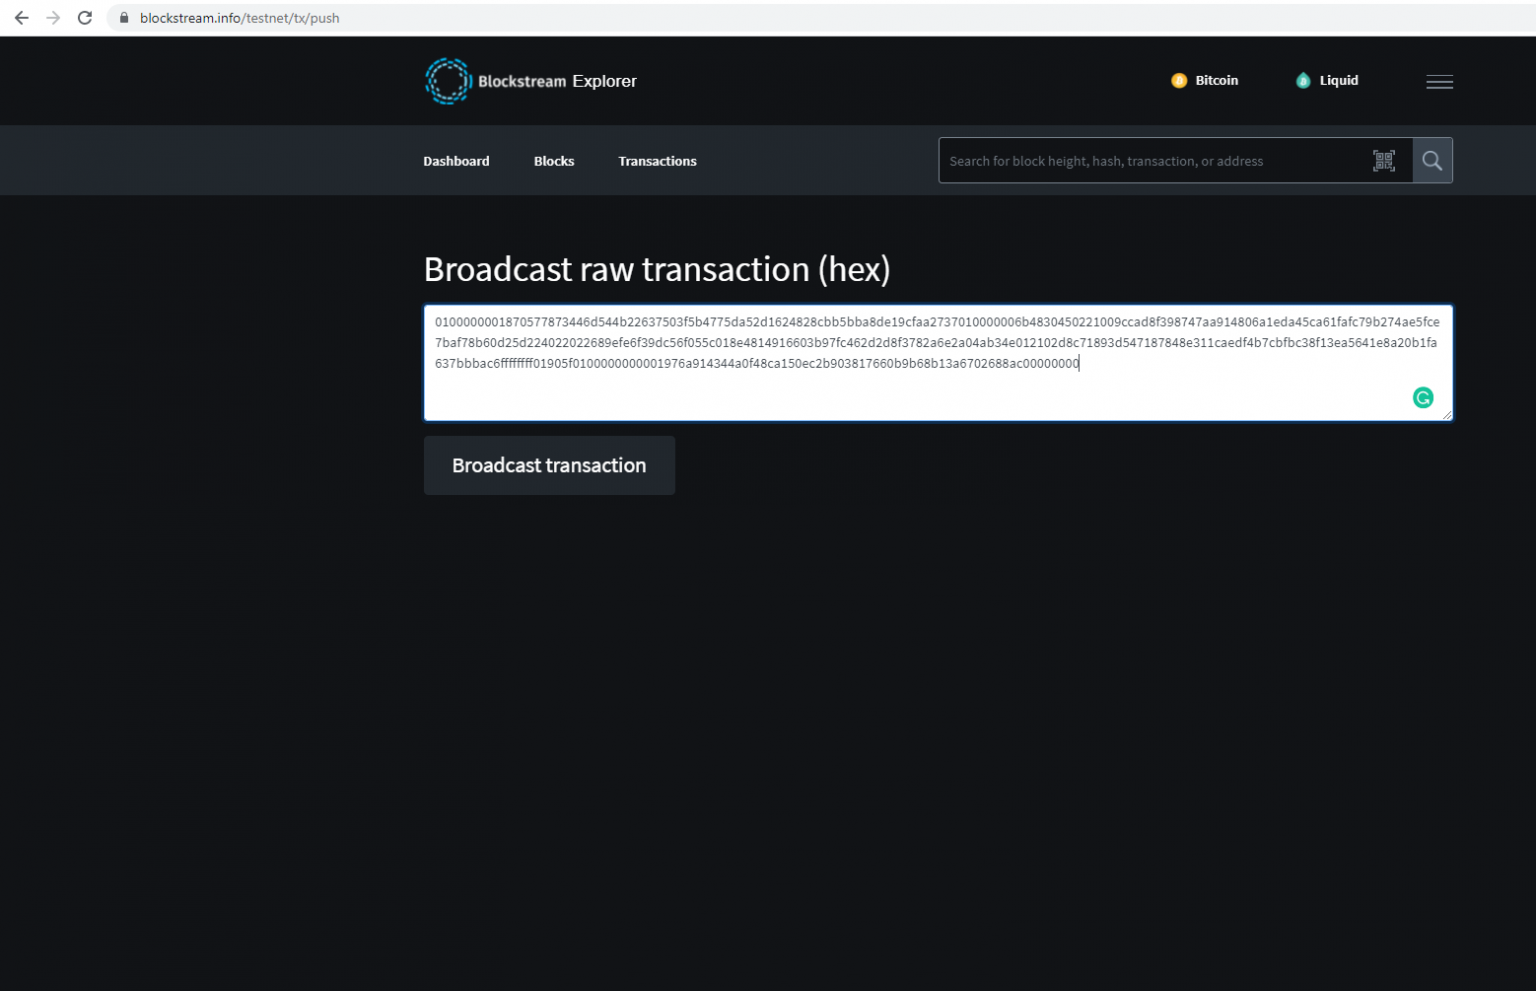
Now that we have the serialized signed transaction, we just need to broadcast it to the Bitcoin network. For that, we are going to use Blockstream’s broadcast service. Just paste the serialized signed transaction in the text area and click on Broadcast transaction. Again, for privacy reasons, broadcast mainnet transactions using your Bitcoin node.
If all went well, you have broadcast your transaction to the test Bitcoin network! You may encounter the following page after you broadcast the transaction. If that is the case, do not worry, it only means that the service did not find your transaction just after you broadcast it.
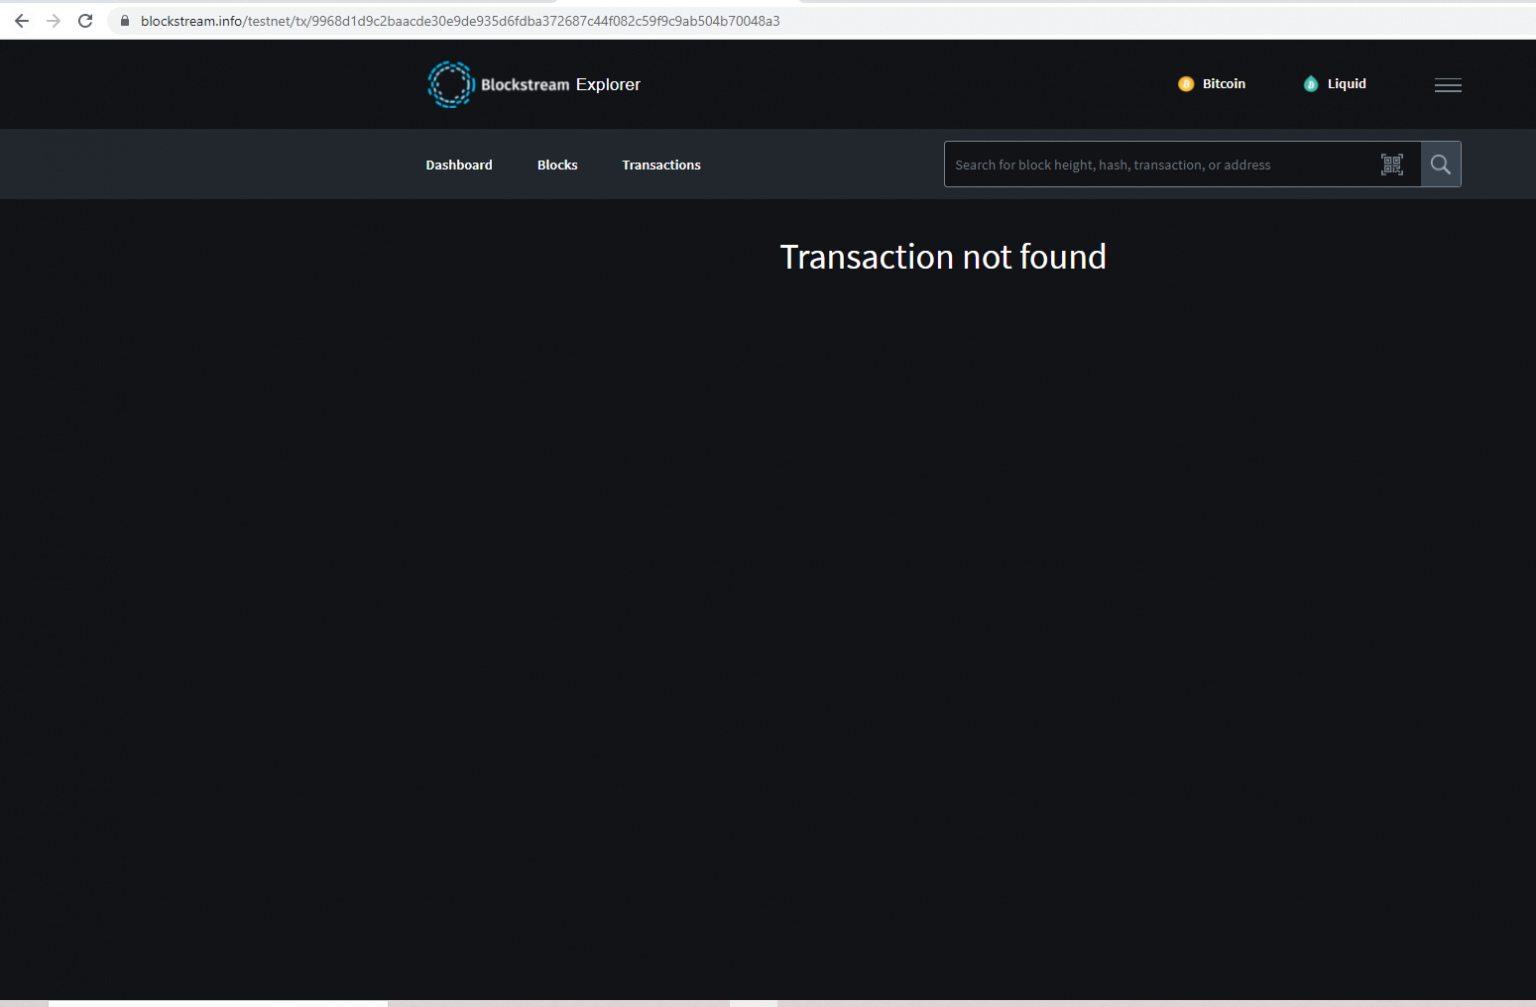
If you have not been redirected to your transaction, just search for your transaction on a Blockchain Explorer. Get the transaction’s ID using the code below.
System.out.println("Transaction id: " + transaction.id());
If everything worked, you will be able to find the new transaction’s details on a Blockchain Explorer. If your transaction has not been confirmed, it will probably get some confirmations in a few minutes.